Similar to GitHub Actions, Azure can automate the building / testing and deploying of your Unity solution. It is true, that Microsoft is on a journey to migrate all build automation to GitHub to offer a more accessible way for developers to automate their project, however,there are a few notable exceptions and capabilities that are still far superior in Azure Devops currently that are worth exploring, namely:
- Publish artifacts / builds per build.
- Finer control / articulation of your automation.
- The ability to manually run automation on command.
- Provide integration that can be consumed in GitHub Actions (useful for kicking off a pipeline when GitHub is finished)
On a personal note, I use a mix of GitHub Actions and Azure DevOps to utilise what each platform is best at. GitHub for quick tests / builds and validation, Azure for producing release / production builds and automating delivery to test suites/stores.
Its FREE
Like GitHub Actions, the majority of Azure Pipelines is free to use and run, and a free Azure account to boot (with even some free Azure credits). The only time you start paying is for spinning up Build / Automation hosts to run your operations, there is a free tier but you can also offset this with your own Build Host (just like GitHub actions).
What can you automate?
Automation provides a ton of capabilities to power and maintain your project, large or small, primarily with the focus on maintaining reliability and giving you an early warning of any potential problems that may be creeping into your project.
Automation can provide:
- Quick checks to ensure work is assigned correctly in your project.
- Validating information provided by the team or customers is accurate.
- Unit test validation. (if you are writing Unit tests, if you are not, why not?)
- Build testing for multiple platforms as required.
- Automated Version control, to ensure project/package versions are maintained. (you really do not want 500 copies of version 1.0 of your project do you?)
- Robust build automation, publishing and deployment.
The list goes on and in most cases, you are just organising what you want to test rather than writing lots of code to build your tests (in your workflow)
Azure Extensions
Azure’s library of extensions and features is well documented and has been in place for many years and there is an element if trustworthiness in the marketplace that GitHub simply cannot match. A lot of the extensions provide integrations into many of the features provided by Microsoft and its partners that enable things you may not have even considered (how about a cost calculator to tell you how much your operations could cost you?).
You can find the Azure DevOps Marketplace here - https://marketplace.visualstudio.com/azuredevops
There are extensions that provide things from:
- Dedicated Unity build automation - a set of reusable tools to fast-track your project automation.
- Integrations with Planning / optimisation tools such as Azure Boards and GitHub projects.
- Code management / validation / optimisation services to ensure your code is “mostly” error free.
- Test result exploring and navigation (although I haven’t had this working with Unity Test outputs yet)
And soo much more.
The one thing to note is that “extensions” are enabled for your organisation and available to all pipelines, they are not on a per-project basis (so if there is a cost associated with an extension, there is only one charge, but most are free).
For the purposes of this article (since it is about building Unity projects), install the awesome Unity Tools for Azure DevOps extension from the Azure marketplace and we will walk through it later.
 https://www.unitydevops.com/
Automation images or Self-hosting
The main (and likely only) cost for automation is the time and processing power needed to run your automation, in the majority of cases this is very minor and Azure Pipelines provide quite a substantial “free” level of processing time for running jobs (and fairly reasonable costs for extra).
Microsoft-hosted pipeline agents
Depending on the requirements to run your actions, Microsoft provides several “images” on their platform to run your code for you:
| Image |
YAML Label |
Included Software |
Rollout Progress of Latest Image Release |
| Ubuntu 22.04 |
ubuntu-22.04 |
[ubuntu-22.04] |
 |
| Ubuntu 20.04 |
ubuntu-latest or ubuntu-20.04 |
[ubuntu-20.04] |
 |
| Ubuntu 18.04 deprecated |
ubuntu-18.04 |
[ubuntu-18.04] |
 |
| macOS 12 |
macos-12 |
[macOS-12] |
 |
| macOS 11 |
macos-latest or macos-11 |
[macOS-11] |
 |
| macOS 10.15 deprecated |
macos-10.15 |
[macOS-10.15] |
 |
| Windows Server 2022 |
windows-latest or windows-2022 |
[windows-2022] |
 |
| Windows Server 2019 |
windows-2019 |
[windows-2019] |
 |
You can find all the details on Microsoft’s hosted images here - https://learn.microsoft.com/en-us/azure/devops/pipelines/agents/hosted
Essentially, these are cloud-hosted environments to run your automation.
For the astute observer who read the GitHub Actions article, you should note these are the same images that GitHub uses, fancy that 😱
Self Hosting
The alternative is to “Self Host”, simply meaning that instead of using a Microsoft-hosted server, you will be using your own box, be that a custom-built machine sitting in your cupboard or even your own workstation (having things run in the background seamlessly). You only need to make sure all the required software is installed (e.g. Unity, if you are doing Unity builds and NodeJS, if you are running NPM commands) and register your Host as a “Pipeline Agent”. If you want, you can even setup multiple agents on the same machine for parallelising your workloads (just be careful how many you register so as not to overdo it on a single machine, especially if it is your developer workstation).
Microsoft’s guide to setting up your own self-hosted agent - https://learn.microsoft.com/en-us/azure/devops/pipelines/agents/v2-windows?view=azure-devops
Self-Hosting is by far the cheapest option as it is your own hardware running all the tasks and GitHub will not charge you a thing.
Setting up Self-hosted agents
Your first project
Getting everything setup in Azure Pipelines is where you first encounter the required “management” setup for getting your automation up and running, on top of your GitHub source control, Azure treats your automation like a full-fledged project, providing many tools to manage and organise everything from:
- Tasks - Azure boards.
- Pipelines - Automation.
- Source Control - If not using GitHub.
- Test Plans - For managing Test runs and output.
- Artifacts - Published builds, data and dependencies
As you can see there is quite a lot available, but for this article, we are just going to focus on Pipelines, feel free to play with the others.
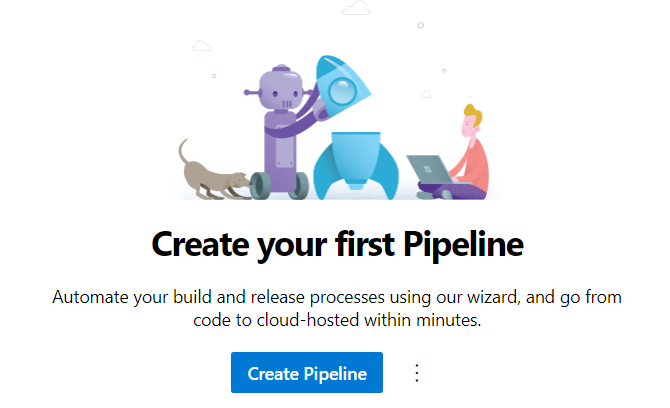
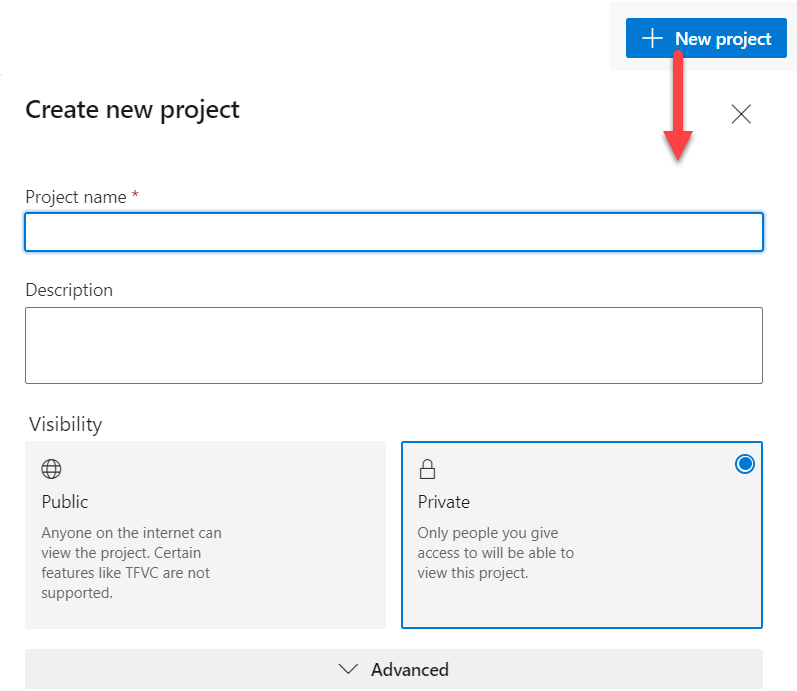
To begin, you need to Logon to Azure Devops and create a “Project” for your Product/automation, choosing if you want it public or private.
Create a new Project
With the project setup, it is time to click on the “Pipelines” tab on the left and get the automation flowing.
Your first pipeline
Unlike GitHub, Azure pipelines does not hold your hand as much as GitHub does, although the syntax for building your automation is very similar.
However, as Azure Pipelines has been “around” a lot longer that GitHub actions, there are many more resources available to keep you going.
When you create your pipeline, you will be asked where the code (and essentially the automation configuration) is hosted, unlike GitHub, the code can be almost anywhere.
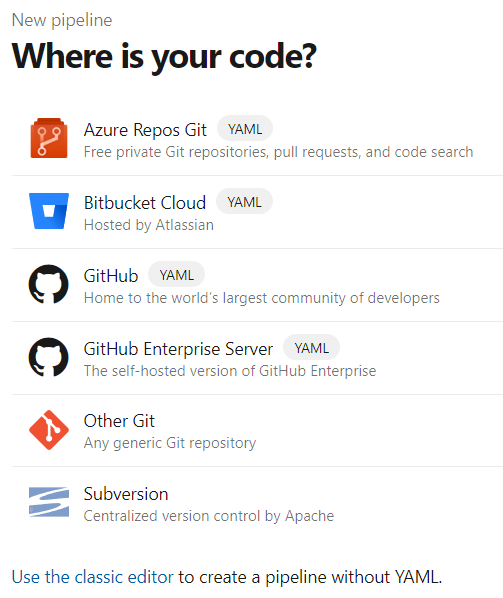
Assuming your code is on GitHub, select that option and then you will be asked to find your repo. By default, this shows you ALL the repositories your GitHub account has created or forked, to see all the repositories your account has access to (from other Organisations for example), then change the filter option (in the top-right) to “All Repositories, use the filter if you need to narrow down the search a bit.
You may get asked for permission to install the Azure pipeline extension for your project, this is just to enable Azure to use the GitHub API for your project/repository.
With the repository selected, all that is left is to initialise the pipeline with your workflow, if you don’t have one already just select the “Starter Pipeline” and we will walk through it.
Changing your pipeline in Azure pipelines is exactly the same as GitHub actions, there is a workflow file checked in to your repository, and to update it you simply need to check in changes to that file, no need to return to Azure to update it if you do not want to (unless you like the graphical editor 😊)
Once you learn to read and build your own workflows, these are quite easy to follow, here is the Standard workflow using Dino’s Unity Tools for Azure DevOps example yaml:
# Trigger the pipeline to run whenever a commit to the main branch is made.
trigger:
- main

# Use a custom agent pool called "Unity Windows" that manages custom agents
# that have the required Unity versions installed and any required SDKs for target platforms
# configured.
pool:
  name: Unity Windows

steps:
# Check out the code from the branch/pr we are building
- checkout: self

# (optional) Run the unit tests for the build
- task: UnityTestTask@1
  name: UnityUnitTests

# Build the Unity project to standalone. Since we are running on a Windows agent, this will produce
# an .exe executable and any dependency files needed.
- task: UnityBuildTask@3
  inputs:
    buildTarget: standalone
    outputPath: $(Build.BinariesDirectory)
    outputFileName: mygame

# Copy build output files to artifact staging directory.
- task: CopyFiles@2
  inputs:
    SourceFolder: $(Build.BinariesDirectory)
    Contents: '**'
    TargetFolder: $(Build.ArtifactStagingDirectory)
    CleanTargetFolder: true
    OverWrite: true

# Finally publish all items in artifact staging to the Azure Pipelines
# artifact storage. They will be available for sharing and/or further processing there.
- task: PublishBuildArtifacts@1
  inputs:
    PathtoPublish: $(Build.ArtifactStagingDirectory)
    ArtifactName: drop
    publishLocation: Container
The workflow is made up of several easy-to-understand sections:
1. Trigger
The Trigger is an event that occurs in the Azure Pipeline, this can be overridden in the Pipeline Trigger configuration if you wish to make changes on the backend (also useful for making manual workflows run via command).
The most common trigger is the “Push” (when code is pushed to a branch) or “Pull_Request”” (when a PR is raised or updated from a push), however, if you check the list of things that can be “triggered” almost anything can be a trigger, from comments, to schedules and more.
The types of trigger can vary based upon where your source is held and what you are integrating with, from Azure Repos, GitHub, Bitbucket or even TFS (Team Foundation Server, the precursor to Azure Repositories/GitHub).
2. Agent Pool
Unlike GitHub which identifies hosts to run the workflow on by attributes, Azure simply needs to identify the group of machines to run the Job on, organised in an “Agent Pool”. You can see the Agent Pools you have configured by default from your Azure Organisation settings as shown below:

You can create your own or alternatively use one of the Microsoft-Hosted agents above by stating the “image name” you want to use, for example:
- windows-latest (latest version of windows)
- windows-2022 / windows-2019 (specify a specific version of windows)
- ubuntu-latest (latest linux ubuntu host)
- ubuntu-22.04 / ubuntu-20.04 / ubuntu-18.04 (specific versions of linux)
- macOS-latest(yes, you can even build on a Mac in Azure)
- macOS-12 / macOS-11 / macOS-10.15 (specific versions of MacOS)
Just remember that when you are using the Microsoft-Hosted agents, they are clean, any additional software you need (for example Unity) will need to be installed via the pipeline as it is running.
Personally, I always used a self-hosted agent, it has everything you need and only costs you what it costs to run it, no surprises (until it is down of course)
If you wish, you can also set the Agent Pool at the Job level instead of at the top of the pipeline, this enables you to run concurrent builds on multiple hosts, for example:
  jobs:
- job: Linux
  pool:
    vmImage: 'ubuntu-latest'
  steps:
  - script: echo hello from Linux
- job: macOS
  pool:
    vmImage: 'macOS-latest'
  steps:
  - script: echo hello from macOS
- job: Windows
  pool:
    vmImage: 'windows-latest'
  steps:
  - script: echo hello from Windows
3. Jobs
Jobs are simply a batch of work that will run on a single GitHub Runner (self-hosted or Github server). Each job is SELF-CONTAINED meaning that the work it carries out is isolated from any other work when it performs its tasks (steps). If two jobs are running on the same machine, they simply do not know about each other and cannot (by default) share work or information.
Jobs are optional (as shown in the example earlier), if you only have one set of steps then you can skip the Job setup.
You can have multiple jobs defined in a single workflow and even have dependencies (Job 1 runs, but Job 2 requires Job 1 to finish successfully to run) between jobs. There is a lot you can do but for the most part and in the majority of workflows I have developed, one job is usually enough.
In a Job, you define what it Runs-on (the host) and then a list of Steps (or tasks) to run in sequence. You can even make Conditional statements to state “IF”” a job should run, e.g. “Run this job IF the users name is X”. (conditionals can also be applied to Steps, see later).
4. Steps
Steps are exactly how they sound, like walking, you take one step and then the next (providing you have not fallen down in-between steps). Steps can also be given names and in most cases require parameters (With statements) in order to function, always check the documentation for a GitHub Action if you are unsure.
One thing to keep in mind is that By Default, ANY step that fails will prevent any further steps from being run as the pipeline fails on any exception. You can override this (especially if you are building for multiple platforms) if you want, or you can leave it at the default.
Based on Dino’s yaml script above, the following steps are undertaken:
- Checkout the latest code from the branch the workflow was triggered on (checkout: self)
- Run any Unit tests located in the project (task: UnityTestTask@1), this is optional and can be skipped if you have no tests.
- Build the Unity project for Windows Standalone (task: UnityBuildTask@3), obviously configurable to build for whichever platform you need.
- When you package the build, we only want to include the actual build files and not everything (task: CopyFiles@2) so copy the actual project to a Staging Folder
- Finally, we push the built project to the Azure Artifacts area (task: PublishBuildArtifacts@1) so you can download it from Azure.
Personally, I also include an Archive task (task: ArchiveFiles@2) in-between steps 4 & 5, so there is just one file to download 👍
Check out the other documentation on the Unity Tools for Azure DevOps site for more information regarding the extension.
Getting your Azure Pipelines running
Once you have configured your Pipeline you can either Click “Save and Run” (the default) which will automatically run the pipeline straight away with whatever code you have checked in, or simply click “Save” which will commit your pipeline to your repository ready for the next time the trigger is fired.
Now every time you push to the branch you have configured (if using the example above) or if you set a PR as the trigger, each time a pull request is made, the pipeline will automatically run and spit out a build.
Just make sure that you have your Self Hosted agent setup correctly before running the pipeline, or ensure you have everything you need to run on a microsoft-hosted agent in the pipeline
I did find a YAML definition for Azure Pipelines to build Unity projects using a Microsoft-Hosts Windows Server agent that installs and runs unity here.
Too much more to mention
There is soo much more that can be done with Azure Pipelines beyond the basics shown here, but you should now have a taste of what is in store, from the basics to the advanced.
Check the Azure Pipelines docs for more.
If you need to also check out the costs, have a look at the pricing page
Any questions, leave a comment below.
Simon (darkside) Jackson
Engineer, industry executive, research enthusiast. Avid learner with diverse interests in coding, game development, Mixed Reality (AR/VR/XR) and reinforcement learning. 25+ years of experience working in multinational corporations and startups.

Comments